Furniture Painting: Simple Tips to Refresh Your Home
Got a tired coffee table or dated dresser? A fresh coat of paint can turn it from bland to brilliant in a weekend. You don’t need a professional – just the right prep, paint, and a bit of patience. Below are the core steps that keep the job easy and the finish looking great.
Choosing the Right Paint & Prep Work
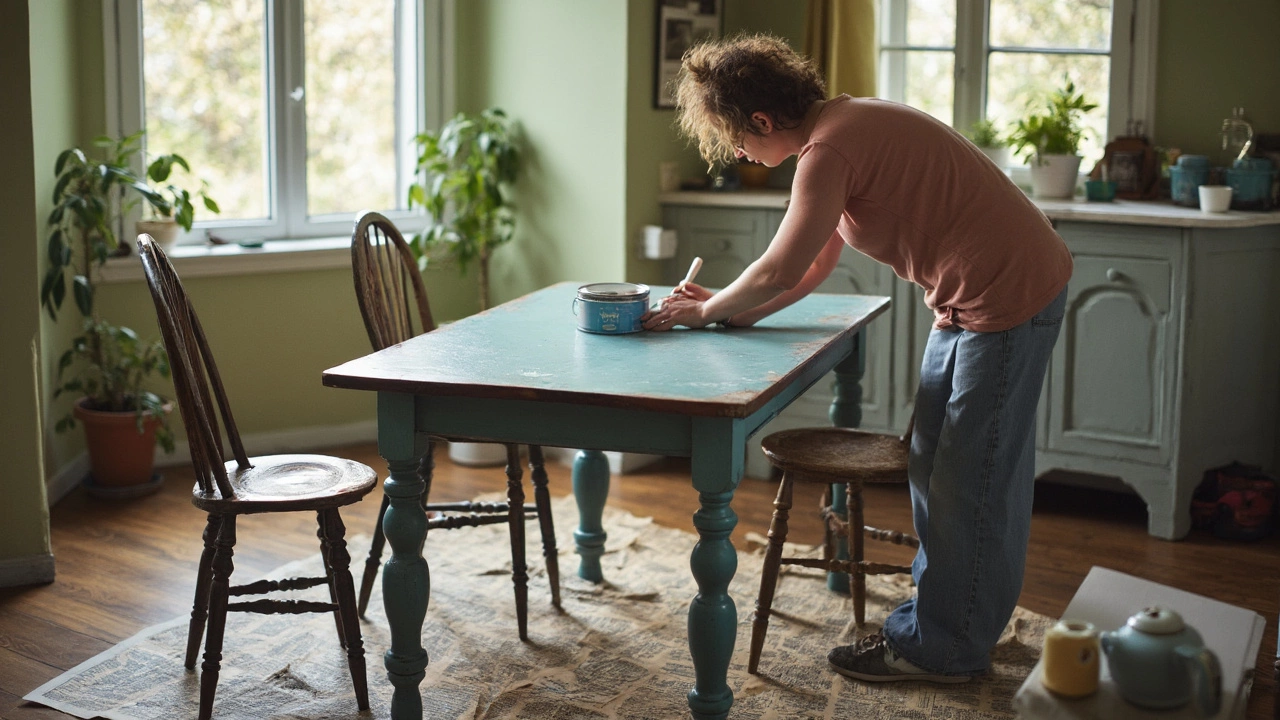
First, pick a paint that fits the piece. Chalk paint works wonders on wood because it sticks without heavy sanding, but it can chip if you don’t seal it. For a smoother, more durable finish, opt for a water‑based latex or acrylic enamel. If the furniture has intricate details, a spray‑in‑a‑can can reach tight spots without brush marks.
Clean the surface thoroughly. Wipe away dust, grease, or old wax with a mild detergent and let it dry. A quick sand with 120‑grit paper smooths rough patches and helps the new paint adhere. Don’t over‑sand – you just want a lightly scuffed surface, not a stripped‑down board.
Prime if needed. Light‑colored paint over a dark piece usually needs a primer, especially with latex. A primer also helps block stains from previous finishes. One thin coat is enough; let it dry according to the label before you move on.
Finishing Techniques That Last
When painting, work in thin, even strokes. A 2‑inch brush is perfect for larger surfaces, while a ½‑inch brush handles trim and edges. Start with the grain of the wood, then go against it to smooth out brush lines. If you’re using spray, keep the can about 10‑12 inches from the surface and move steadily.
Let the first coat dry completely – usually 2‑4 hours for latex, less for chalk paint. Lightly sand with fine‑grit (220) paper between coats to avoid drips and create a silky texture. Two coats give depth; three coats, if you’re after a bold colour, lock in coverage.
Seal the work. A clear matte polyurethane protects the paint from scratches and moisture, making the piece kitchen‑friendly. For a glossy look, swap to a satin or gloss sealer. Apply the sealer with a clean brush or a foam roller for a smooth film, and let it cure for at least 24 hours before using the furniture.
Pro tip: add a pop of personality with a distressed finish. Lightly sand the edges after the final coat to reveal the wood underneath – it creates a vintage vibe without a lot of effort.
Now you’ve turned a dull item into a statement piece that matches any décor. The best part? You can repeat the process for multiple items, keeping costs low and style consistent. Grab your brushes, pick a colour you love, and give your home a fresh look today.
Modernize an Old Table: Simple Upgrades for a Fresh Dining Room
- Gavin Whitaker
- |
- |
- 0
This guide gives practical steps to turn your outdated table into a modern statement piece. Discover how a new coat of paint, hardware swaps, and even a table leg change can completely refresh the look. Get tips on basic repairs and bold styling choices that work for everyday homes. Learn how to update an old table without spending much money or needing fancy tools. Ideal for anyone who wants their dining room to look up to date without buying a brand new table.
View more