Bedroom Decorating Order Planner
0% Complete
Define Purpose and Budget
Decide room function and allocate fundsMeasure and Draw Floor Plan
Sketch room dimensions and furniture layoutChoose a Color Palette
Select base, accent, and neutral colorsInstall Flooring or Area Rugs
Lay new floors or position rugsPlan Lighting
Determine ambient, task, and accent lightingFit Window Treatments
Mount curtains, blinds, or shadesPlace Major Furniture
Position bed, dresser, nightstands, etc.Layer Bedding and Soft Furnishings
Add sheets, duvets, throws, cushionsAdd Artwork and Accessories
Hang pictures and arrange décorIntroduce Plants and Personal Items
Add greenery and personal touchesDefine Purpose and Budget
Ask yourself: will this be a minimalist retreat, a cozy nook, or a multifunctional room? Write down priorities – a sturdy wardrobe, a work desk, or extra seating. Budget allocation typically looks like 30% for big items (bed, dresser), 20% for flooring, 15% for paint, 15% for lighting, and the remaining 20% for soft goods and décor.
Key Takeaways
- Start with a clear plan and set a realistic budget.
- Paint or wall treatment comes before large furniture.
- Lighting, flooring and window dressings shape the room’s mood early.
- Arrange furniture first, then add bedding and soft accessories.
- Finish with artwork, plants and personal touches for a lived‑in feel.
When you think about Bedroom decorating is a process that transforms a plain sleeping space into a personal sanctuary. Getting the bedroom decorating order right saves time, avoids costly re‑moves and makes the room feel cohesive from day one.
Why a Planned Order Matters
Skipping steps or juggling too many tasks at once often leads to mismatched colors, furniture that doesn’t fit, or unfinished corners that look sloppy. A logical sequence lets you layer decisions: first the big, immovable elements, then the softer, change‑able pieces.
Step‑by‑Step Decoration Sequence
- Define purpose and budget - decide if the room will be a sleep‑only zone, a home office hybrid, or a kids’ retreat. Write down a spend limit and prioritize must‑haves.
- Measure and draw a floor plan - use graph paper or a free app to sketch the room’s dimensions, door swings, and windows. This helps you visualize furniture placement before buying.
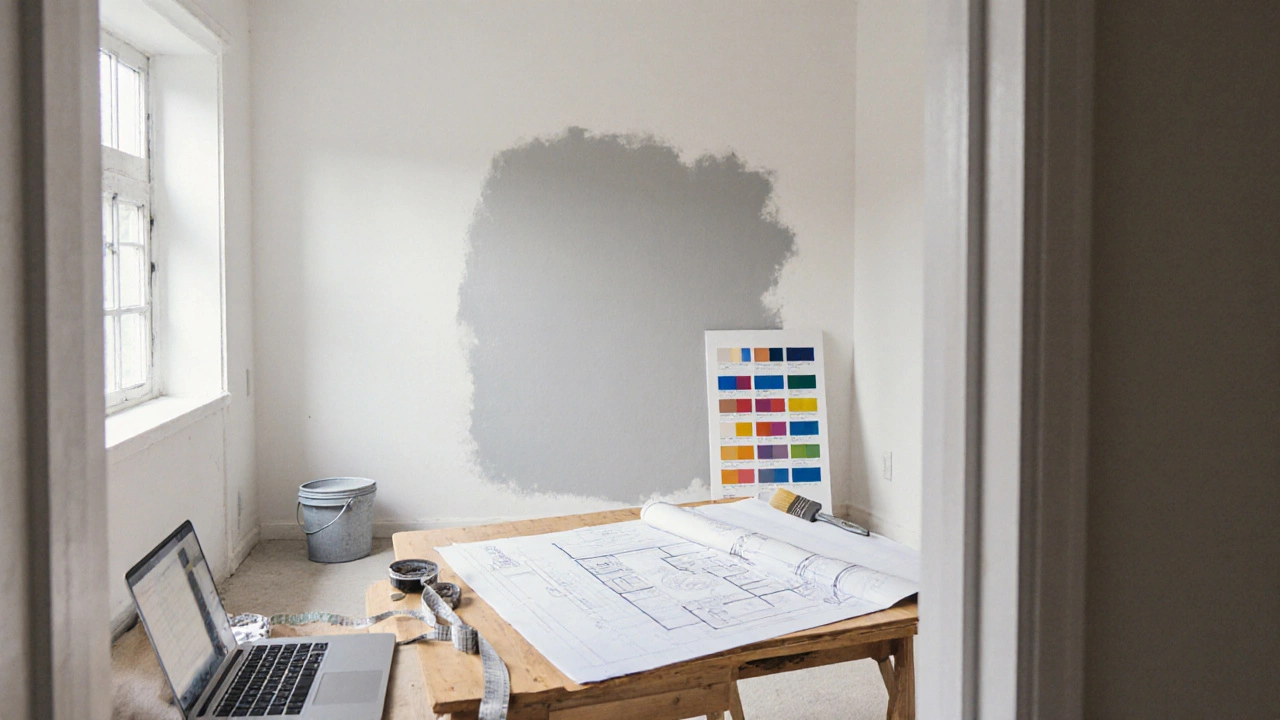
- Choose a color palette - pick a base wall color, accent shade, and complementary neutrals. Paint or wallpaper goes on now, because it’s messy and hard to do after furniture arrives.
- Install flooring or area rugs - if you’re laying new hardwood, laminate or carpet, do it before the biggest pieces enter. An oversized rug can also be placed now to define the sleeping area.
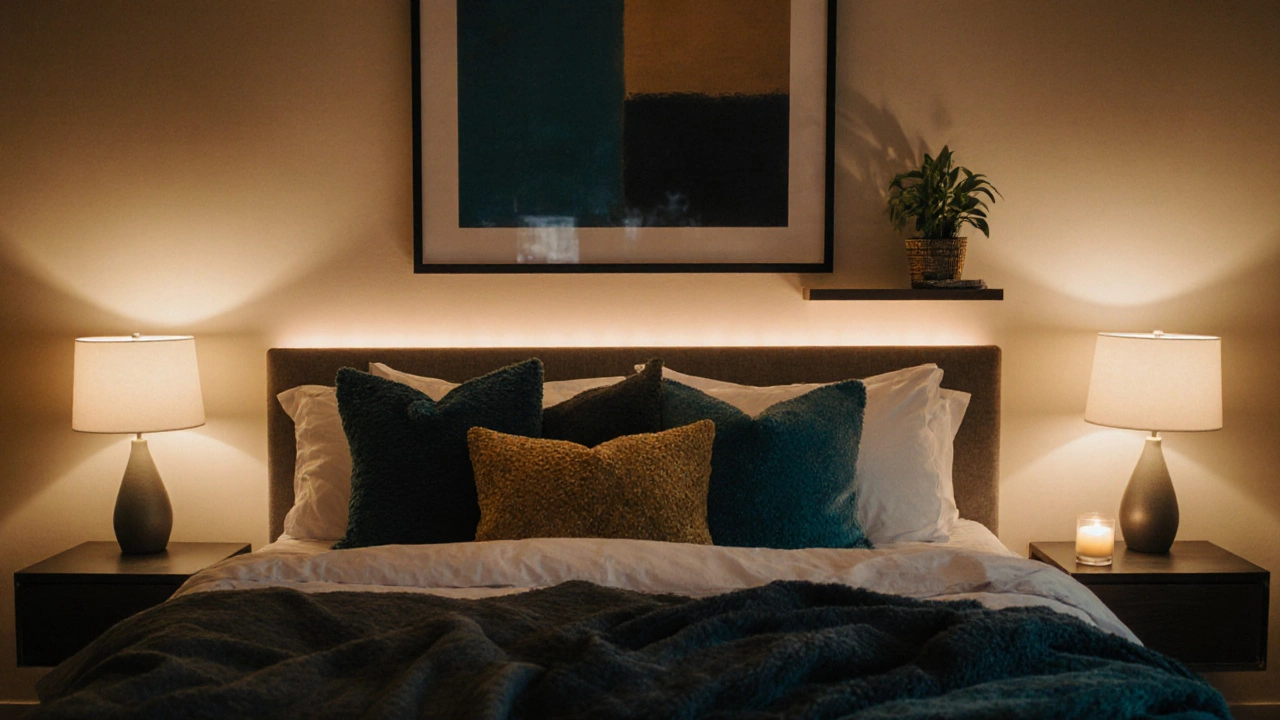
- Plan lighting - decide on overhead fixtures, bedside lamps, and ambient sources. Install wiring and fixtures before you fill the room.
- Fit window treatments - curtains, blinds or shades set the light level and add texture. Mount them after walls are painted but before large furniture blocks the windows.
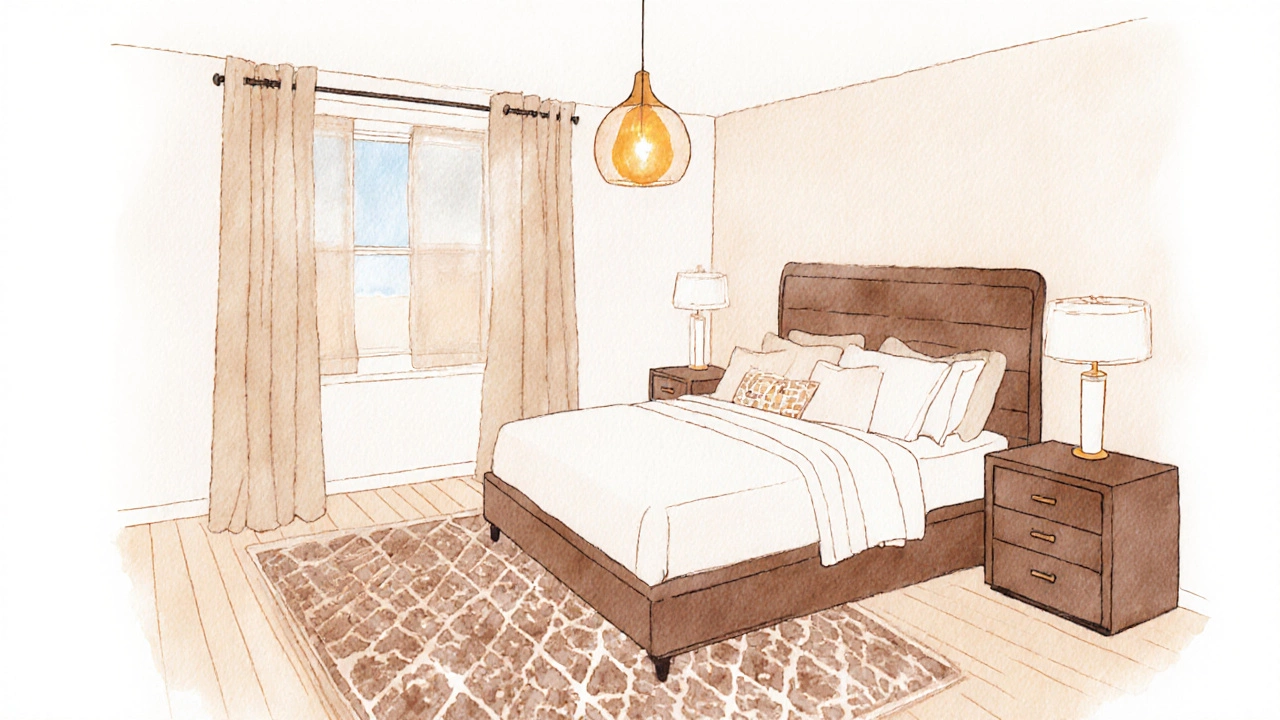
- Place major furniture - start with the bed, then nightstands, dresser, and any desk or seating. Use your floor plan to keep traffic flow clear.
- Layer bedding and soft furnishings - add the mattress, mattress topper, sheets, duvet, and pillows. Follow with throws and cushions that echo your color palette.
- Add artwork and accessories - hang pictures at eye level, place decorative objects on nightstands, and arrange books or trays.
- Introduce plants and personal items - a small potted plant or a scented candle brings life and personality to the space.
Deep Dive Into Each Stage
1. Define Purpose and Budget
Ask yourself: will this be a minimalist retreat, a cozy nook, or a multifunctional room? Write down priorities - a sturdy wardrobe, a work desk, or extra seating. Budget allocation typically looks like 30% for big items (bed, dresser), 20% for flooring, 15% for paint, 15% for lighting, and the remaining 20% for soft goods and décor.
2. Measure and Floor Plan
Measure wall lengths, window heights, door widths, and ceiling height. Sketch a simple layout: mark fixed features, then experiment with furniture placement. Digital tools let you drag and drop pieces, which helps avoid surprises later.
3. Color Palette
Pick a main wall color that reflects the mood you want - cool blues for calm, warm beiges for comfort. Use an accent wall for a splash of personality. Test paint swatches on the wall for a few days; natural light can change the hue dramatically.
4. Flooring
If you’re installing new flooring, choose a material that matches your lifestyle: hardwood for durability, cork for softness, or carpet for warmth. Lay an area rug that’s at least 60‑70% the size of the bed to anchor the space.
5. Lighting
Combine three lighting layers: ambient (ceiling fixture), task (bedside lamps or a desk lamp), and accent (LED strip behind headboard or wall sconces). Choose bulbs with a color temperature of 2700‑3000K for a relaxing glow.
6. Window Treatments
Measure twice, mount once. Light‑filtering curtains let in daylight while preserving privacy. Blackout options are essential for sleep‑focused rooms. Coordinate the fabric with your color palette for seamless integration.
7. Major Furniture Placement
Center the bed on the main wall, leaving space for nightstands on each side. Keep at least 24‑inch walkways around the bed and 36‑inch clearance near doors. If space permits, add a small chair or ottoman for a reading corner.
8. Bedding and Soft Furnishings
Layer textures: a crisp percale sheet, a plush duvet, and a decorative throw. Stick to two‑ or three‑tone palettes to avoid visual clutter. Swap pillow colors seasonally for a fresh look without extra cost.
9. Artwork and Accessories
Hang artwork at eye level - about 57‑inch from the floor for most adults. Use matching frames for a gallery feel, or mix styles for eclectic charm. Keep accessories balanced; a pair of nightstand lamps should mirror each other.
10. Plants and Personal Touches
Choose low‑maintenance plants like snake plant or pothos for bedrooms. Place them on a dresser, a floating shelf, or a bedside table. Add a framed photo or a favorite book to make the room truly yours.
Bedroom Decorating Checklist
| Stage | Primary Tasks | Approx. Time |
|---|---|---|
| Purpose & Budget | Define room use, set spend limit, prioritize items | 1-2hours |
| Measurements | Measure walls, windows, doors; draw floor plan | 1hour |
| Color & Paint | Select palette, test swatches, paint walls | 1-2days (dry time) |
| Flooring / Rug | Install flooring or lay rug | 1day |
| Lighting | Install fixtures, add lamps | 4-6hours |
| Window Treatments | Mount curtains or blinds | 2-3hours |
| Furniture | Place bed, nightstands, dresser, desk | 2-3hours |
| Bedding | Make bed, add throws and cushions | 1hour |
| Art & Accessories | Hang art, arrange décor | 1-2hours |
| Plants & Personal Items | Place greenery, display photos | 30minutes |
Common Pitfalls and How to Avoid Them
- Buying before you paint: Heavy furniture can splatter paint, causing extra cleanup.
- Ignoring traffic flow: Keep pathways clear; a cramped room feels chaotic.
- Over‑matching colours: Too many identical shades make the room feel flat. Add texture or a contrasting accent.
- Skipping lighting layers: Relying on a single ceiling light leaves the room dim at night.
- Choosing the wrong rug size: A rug that’s too small makes the bed look unsupported.
Frequently Asked Questions
How long does it take to fully decorate a bedroom?
Most people finish in one to two weekends if they follow a clear order. Painting and flooring take the longest because of drying time, while bedding and accessories can be added in a few hours.
Should I buy all furniture before I start decorating?
No. Secure the big pieces first (bed, dresser) then add secondary items like chairs or storage baskets after you see how the space flows.
Is it okay to paint the ceiling a different colour than the walls?
Yes, a subtle contrast can add depth, especially in rooms with high ceilings. Keep the hue muted to avoid overwhelming the eye.
What lighting level is best for a bedroom?
Aim for 300-400 lux overall. Combine a soft overhead fixture with bedside lamps at 150-200 lux for reading.
How do I choose the right rug size for a queen‑size bed?
A rug that’s at least 60 inches wide works well. Ideally, it should extend 24‑30 inches beyond the sides of the bed and reach the foot of the bed.
Next Steps
Grab a tape measure, sketch a quick floor plan, and start with the wall colour. Follow the order above, and you’ll end up with a bedroom that feels intentional, comfortable, and uniquely yours.